Diy tassel garlandhi there! So the other day I was browsing Pinterest and I came across this adorable DIY tissue paper tassel garland. It reminded me of one I was going to buy at Hobby Lobby, but I thought it was kind of expensive for some tassels and string, so I waited to see if I could find anything else (thank God for Pinterest!). That's why in today's post I will be showing y'all how to make this DIY tassel garland. 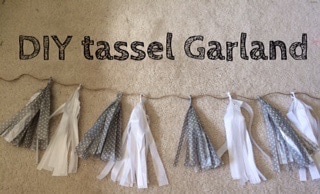 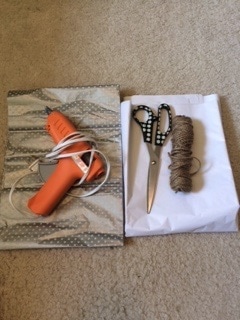 For this project you will only need 4 things: Tissue paper (2 sheets will make 8 tassels) String or ribbon Hot glue gun Scissors The first thing you need to do is choose what color(s) tissue paper you want. I chose silver and white polka dot and plain white tissue paper. Pick one of the colors to start with. First, unfold one piece of paper with the design facing down. 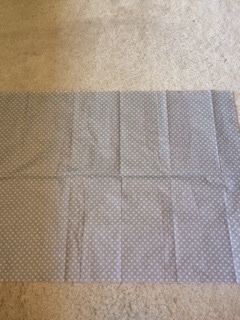 Fold the piece of paper down, or lengthwise. 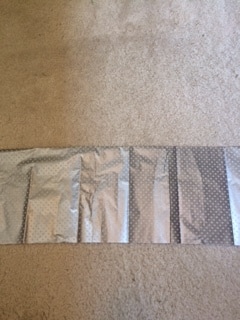 Fold it over, or widthwise. Then, widthwise again. 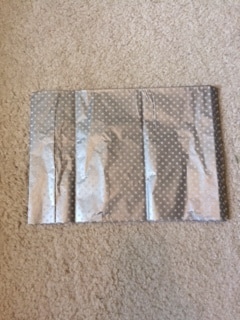 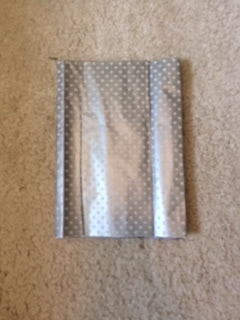 Now, cut it's time to cut the tassels! Leave about one inch or so from the top, and make sure you cut from the bottom (the side that's not folded). 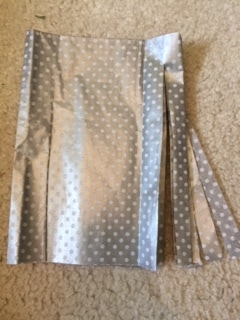 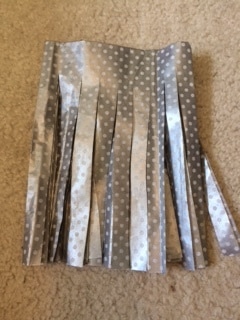 Once you've cut all the way through, unfold the tissue paper from the side. 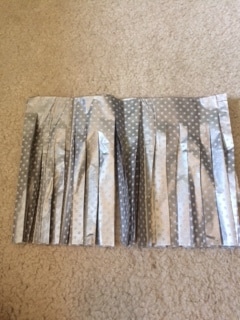 Cut all the way through the center of the paper, dividing it in two pieces.(the section on the right should automatically be two pieces after you cut it, so you are technically cutting it into three pieces)  Next, unfold the section on the left and cut through the center of that piece. 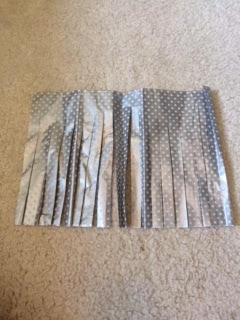 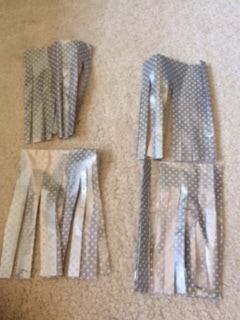 You should now have four sections of tissue paper. Unfold one of them and set the others aside. 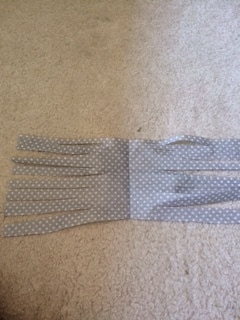 From here, roll the top of the section all the way to the bottom. 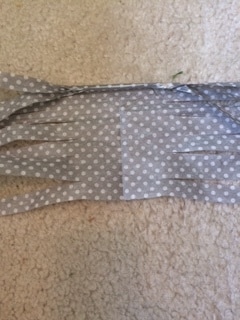 Once you've rolled it all the way up, twist the rolled part (don't twist the fringe). 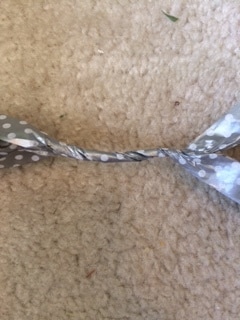 Now, "bend" the rolled part of the paper so it forms a loop.  Next, hot-glue where the two twisted sections meet. (where my thumb is) 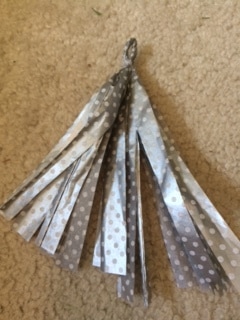 That's it! Now, repeat the steps with the other three sections and any other color you chose. 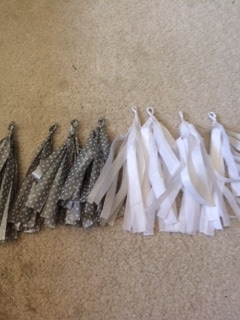 Here are all of the tassels I made. Now, you just need to cut whatever string you chose and string it through the holes on the tassels. 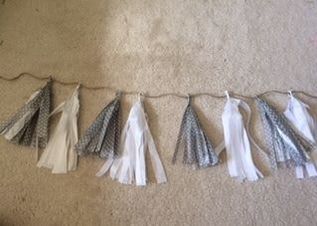 Here is my finished garland... 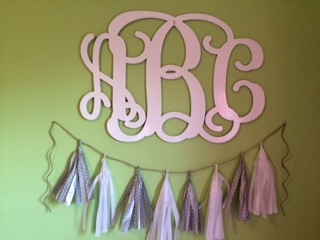 and here it is hanging on my wall! I know my explanation made it sound like a long process, but this took me about ten minutes to make the whole thing and it turned out super cute! The white tassels are a bit longer than the silver ones because the sheets are bigger, but you can always trim it off if you don't like the un-even ends.
I hope you were inspired by today's post to make your own garland! If you made your own, tag me on Instagram (@thegeorgianprep) so I can see how yours turned out! Thank you so much for reading! xoxo, The Georgian Prep
1 Comment
|
