|
Hey guys! I love doing my nails, but I'm not the most talented at getting the polish on all of my nail without the polish all over my fingers (anyone else?). My mom saw an ad in Ulta's emails about a brand called Flowery that makes nail polish correcting pens. Today, I will be showing y'all how to do DIY water-marble nails, and then use the pen to take the polish off my skin. (I also apologize for the quality of these pictures, it's kind of hard to take them when you have nail polish on your fingers!) 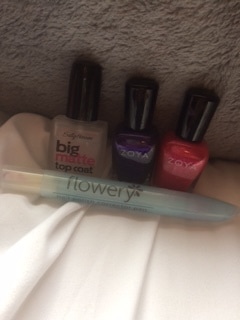 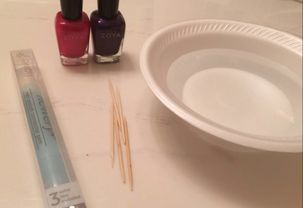 You will need a bowl, toothpicks, water, and at least 2 colors of nail polish (and a top coat if you would like). I used Zoya purple (I don't know the shade) and pink polish in the shade "Mae". For my top coat I am using Big Matte Top Coat by Sally Hansen. You will also need something to get the polish off, like nail polish remover, or a corrector pen like this one. 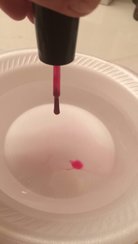 The first thing you need to do is take your first color and let it drip into the water (don't wipe off the brush like you would if you were putting it straight onto your fingers). It should spread out into a thin blob on the surface of the water and it will look really cool! 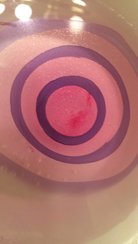 Now, keep dripping polish in the center of the last blob until you've made something that looks like this. 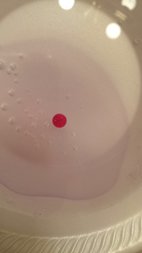 (Sometimes, the polish won't spread out and it will just stay a little drop of polish. Just keep trying again until it spreads!) 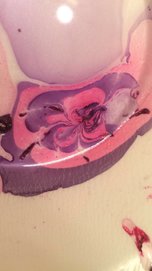 Now, take your toothpick and make swirls or lines in the polish. (this isn't a very good example, but unfortunately it's the only picture I took of this step) 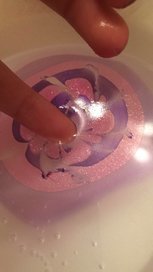 Here's the messy part. Pick a spot in the swirls you've created and gently dip your finger in the bowl, The design should stick on the nail. After you've taken your finger out, take another toothpick and drag it in the water to pick all of the polish out of the bowl. 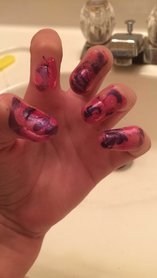 After I did all of my nails, this is what they looked like. Now you will need your nail polish remover or a correcting pen. 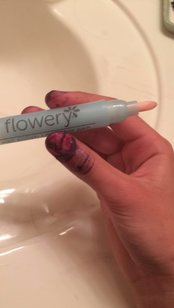 So this is what the Flowery nail correcting pen looks like. On the front end there is one brush that is slightly damp.... 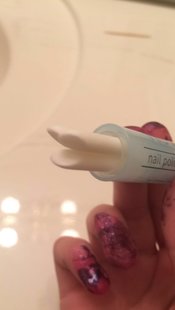 and on the back end there are three replacer tips. Basically, all you have to do is press and rup the brush where you have polish About halfway through, I decided it was taking way too long, so I used nail polish remover instead. I've used the pen before on a little polish, and it worked great, but I think the more polish you have on your fingers, it gets dried out easier. Overall, I'm a little disappointed, but I'll try again when it can dampen up some. 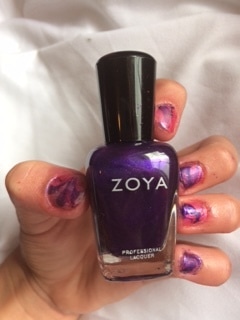 Here is the finished product. I hope you enjoyed today's post and are inspired to water-marble your nails. If you did, let me know how they turned out! Pink polish https://www.zoya.com/content/category/Zoya_Nail_Polish.html?col=ZP794 Purple polish https://www.zoya.com/content/category/Zoya_Nail_Polish.html?col=ZP428 Sally Hansen top coat http://www.sallyhansen.com/nails/nail-care/base-top-coat/big-matte-top-coat Flowery corrector pen http://www.ulta.com/nail-corrector-pen?productId=xlsImpprod14901013&sku=2310120&_requestid=8914423 thanks for reading! xoxo, The Georgian Prep
0 Comments
|
